← All chapters · Book · Repository
Practice Lab: Installing RHEL 10 in a VM
Red Hat RHCSA 10 Study Companion: Getting Ready for the EX200 Exam by Andrey Markelov (May 2026).
What you need
Most exercises in this companion repo assume a single throwaway machine running Red Hat Enterprise Linux 10. A practical starting point is 2–4 virtual CPUs, at least 1.5 GiB RAM, and 10 GiB disk. A few storage topics are easier with a second disk (many answer scripts refer to `/dev/sdb`), but you can still practice on one VM if you attach an extra virtual disk later.
You can build the lab on a laptop with VirtualBox, VMware Workstation, or Linux KVM/QEMU, or spin up a small instance in a cloud free tier. The goal is an isolated environment you can snapshot and reset—not your daily workstation.
Get the installation image
Download the RHEL 10 DVD ISO (`rhel-10.x-x86_64-dvd.iso`) after creating a free account at Red Hat Developer. The developer subscription is enough for learning and matches what you need before running package-management exercises.
In your hypervisor, attach the ISO to the virtual CD/DVD drive and boot the VM from it.
Boot the installer
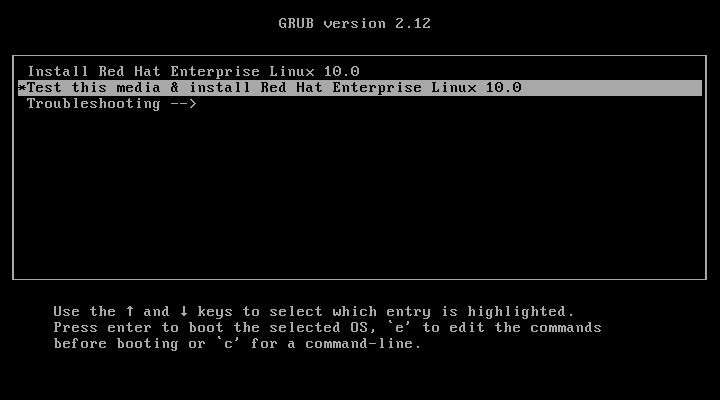
When the VM starts from the ISO you should see the GRUB menu. Pick Install Red Hat Enterprise Linux 10.0, or Test this media & install if you want the installer to verify the ISO first (a good idea right after download). The Troubleshooting entry boots a rescue-style environment and is only needed for repair work.
Walk through the installer hub
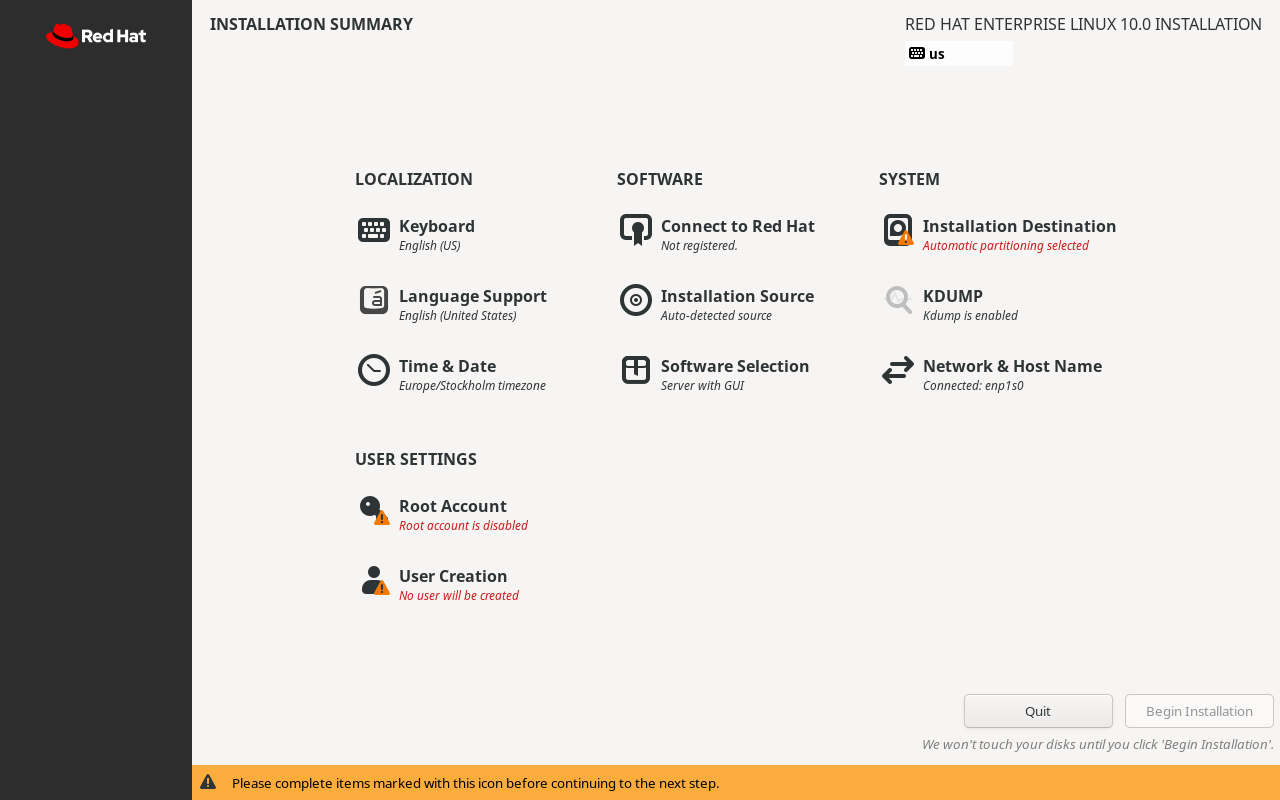
After you choose a display language, Anaconda shows the Installation Summary screen. Treat it as a checklist: any row marked with a warning must be opened and completed before Begin Installation becomes available.
At minimum, configure:
- Installation Destination — pick the virtual disk (automatic partitioning is fine for a lab).
- Root Account — for simplicity in early chapters you may enable root and set a strong password.
- User Creation — create a normal user and grant administrator privileges.
- Software Selection — Server with GUI matches the desktop-oriented tasks in the book.
- Connect to Red Hat — register the system so `dnf` can reach repositories (covered in the next section).
Open Installation Destination, confirm the target disk, and leave the default layout unless you are practicing custom partitioning. On Root Account and User Creation, avoid dictionary passwords in real systems; for a local lab, pick memorable but non-obvious passphrases.
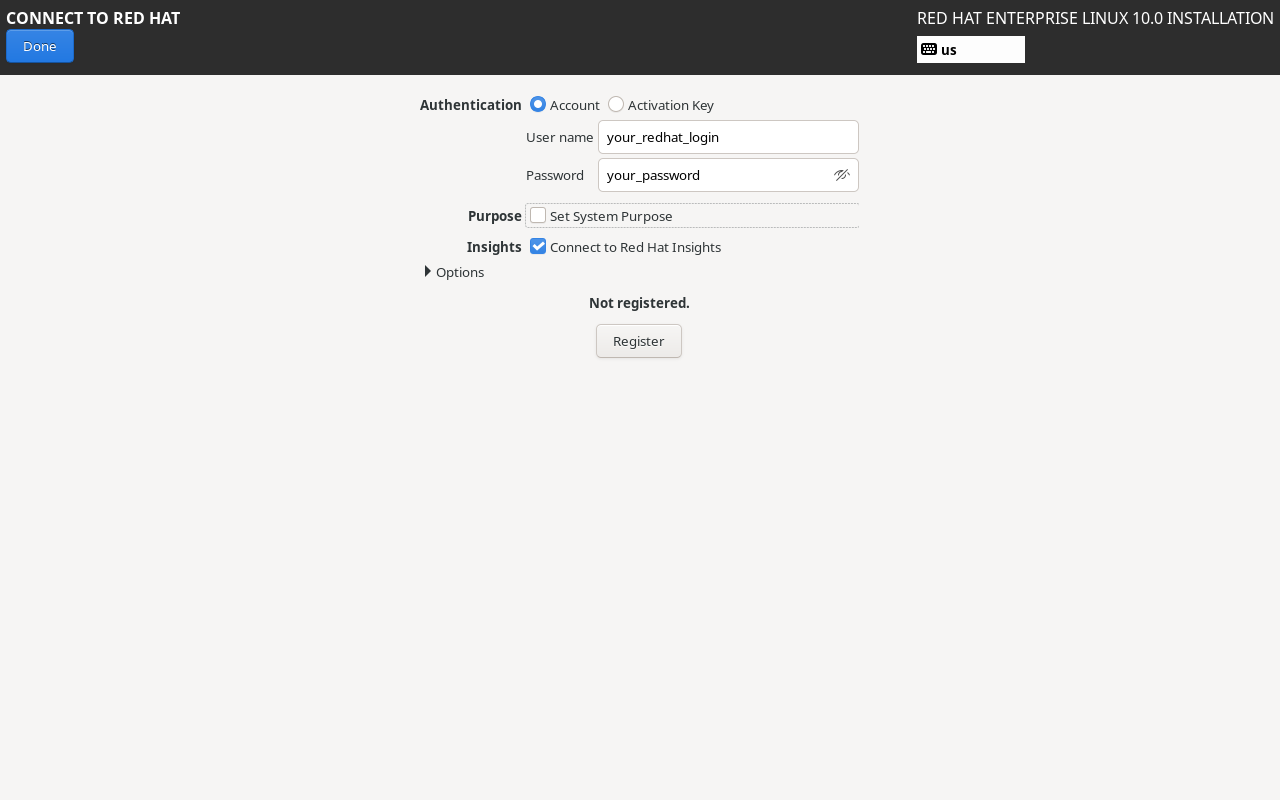
Register with Red Hat
Many later exercises install or update packages. From Connect to Red Hat, sign in with the same developer account you used to download the ISO and click Register. When registration succeeds, the summary page shows that the system is subscribed.
You can complete registration after first boot with `subscription-manager` if you skip this step during install.
Finish and prepare for exercises
Select Begin Installation and wait for Anaconda to finish. Before rebooting, detach the ISO (or let the hypervisor eject it) so the VM boots from disk. After login, take a snapshot of the clean VM.
When a chapter mentions `/dev/sdb`, add a second virtual disk in your hypervisor, rescan if needed, and snapshot again before storage exercises. Run the chapter scripts only inside this lab—many of them change users, firewall rules, networking, or SELinux policy.